To make sure a photo can be printed correctly with the company Pro-am, there are adjustments and alterations needed to be made in Photoshop. Doing this is very simple and easy and allows the image to be printed effectively and in the correct way. The first step to this is to change the image size, this is done by selecting, image then selecting image size. This will make a menu appear on the screen, the menu allows you to alter and change the dimensions and document size, basically the size and fundamentals of the image. The settings to make the image printing are as follows, under document size centimeters should be inches, the number should be 7 and the height should be 5. These apply to landscape photographs, if the photograph was portrait the numbers should be swapped around.
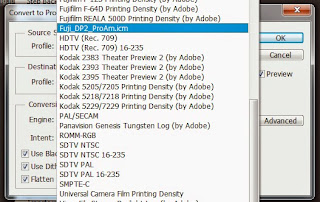
 The next step is to convert the profile of the image, the profile you need may not be on your Photoshop however its is available to download off the Pro-am site, there is even a step by step guide on how to add it to Photoshop. When the profile has been added the next thing to click on is edit, this brings down a drop menu where the next thing to click is convert to profile. This will then show a menu of the screen which allows different profiles to be set for the photo. The profile you need to set to be compatible with pro-am is Fuji_DP2_ProAm.icm.
There is another way, which is to crop the image 5 by 7 and then converting the profile.


No comments:
Post a Comment